

Cables have long been part of our everyday lives. From charging your phone to powering the electronics in your car available in different varieties of cables are all around us. Utility cables affect a big part of our daily tasks too but unlike a control cableor an industrial cable, these type of cables are found underground. This is done to protect them from adverse weather conditions but it also makes them difficult to get to. This can be especially the case when you need to do repairs. But how do you find a faulty cable? Well, for these instances there is a device called a fault mapper (locator) or sometimes known as a reflectometer which can locate a fault that cannot be seen.
How Does a Cable Fault Locator Work?
While there are different types of faults and different techniques used to trace them, the basics of fault tracing is the same for each one. By sending a high voltage surge to the faulty cable, a quality time domain reflectometer is able to detect the area of discharge straight away. That is if the fault is in the cable that’s being tested. Otherwise, the voltage surge will just come back to the neutral or shielding on the cable without a sudden discharge.
Types of Faults
Open
When it comes to the faults of underground cables, the easiest one to detect is an open circuit fault. Why? Because when this occurs the flow of current through the cable drops down to zero. This way you don’t have to look for the spot that caused the fault as open circuit faults occur when one or more phase conductors are broken.
Short
A short circuit fault can be either symmetrical and asymmetrical. A symmetrical fault usually three phases are what’s short-circuited which is often called a three-phase fault. With an asymmetrical short circuit fault, the magnitude of the current is displaced by 120 ° and it is not equal.
How to Find Cable Fault Location
Steps
- The first step towards locating a fault in a cable with a time domain reflectometer (fault) mapper is to make the cable that you’re going to be testing safe. This is done by isolating the cable and then grounding either one or both ends of it. You can’t do one and avoid the other you must do both the isolation and grounding before you approach the cable and start searching for the fault.
- When there are multiple cables in your way you need to identify which cable is the faulty one. This will save you a lot of time searching for the fault as you’ll know exactly which cable to do the testing without second-guessing. Cable identification is done by tracing the cable. Underground cables are not laid down in a straight line thus tracing the cable will only require you to test if it’s following its path. If not then there is probably an issue.
- Identifying the fault is usually done by determining the phase where the fault has occurred. The level of resistance is also important here. This type of test will determine the technique and equipment you’ll need to use to make the correct diagnostic for the fault at hand.
Methods (Techniques)
First, we’ll start with the online and offline methods. The online method is the one that process and then uses the sampled current as well as voltages to determine fault points. The offline method requires a special instrument to be used to test the service of the cable. This method is often categorised in two different classifications, tracer and terminal techniques.
The tracer technique is to wake along the path of the cable, This way the fault point can be determined from the electromagnetic signal which the fault mapper will pick up and notify you. This is a more accurate technique than the previous one.
You’ll also find that a fault locator can use a method called ARC (Arc Reflection Technique). This type of method combines two different methods called thumper and pulse echo technique or TDR. The thumper technique is the one explained at the beginning and the oldest method in the book which every fault mapper can perform.
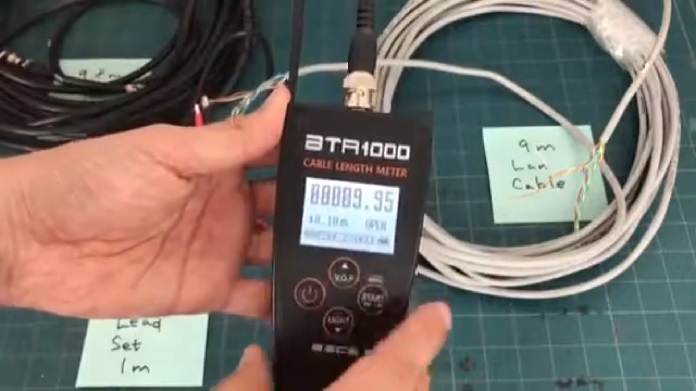
The TDR or pulse echo technique is used to measure the amount of time it takes an electric pulse to get onto a cable and then come back. The device will start measuring the time when the pulse is launched onto the cable and then it will automatically the time needed to leave and return and divide it by two. The mapper then multiplies that result by the speed at which the pulse was travelling.
One thing to remember when performing this type of method is the velocity of propagation. This is the speed at which high-frequency pulses travel on the cable. The speed at which a pulse travels is affected by the thickness of the cable and the type of dielectric (insulative) material it uses. Don’t get confused thinking there’s a fault when a signal is travelling slowly just because of these two factors.


